How to Photograph Your Space like a Professional
Written by Genevieve Kavanaugh, Editor Daily Origin
Originally published September 17, 2020
In today's world of perfect curated Instagram feeds and Pinterest boards, it is easy to aspire to take a similar beautiful photo. Still, interior photography is not as easy as it looks if you are not a photographer.
We sat with Lisa Cole of One Door Home. Lisa is a professional dance artist and fitness instructor by day and a budding photographer and interior stylist by night. Lisa and her husband purchased their One Door Home back in 2018 and renovated room by room since. However, her love for interior design didn't just start there. "I have always been that child rearranging my room. My Mom let me design my room multiple times, picking out furniture and color palette."
“Being a dancer, I think about the energy I want to affect in the space, and I’m more in tune with the aesthetic of things, lines, and lightning - and I ask myself, is this beautiful and do I think it’s beautiful.”
Lisa ended up working for Hudson Interior Designs, a full-service interior design company, and shop in the South End of Boston. It was at Hudson, where her eyes were open to the high-end interior design world and how people thought about their space.
Not only a gifted dancer and interior designer, but Lisa also knows a thing or two about taking a beautiful photo. What tips would you give to a beginner wanting to photograph their home? "I still don't consider myself a photographer. I have learned so much from trial and error. "
The following information has been paraphrased from our interview with Lisa Cole, on September 10, 2020
Natural lighting v. artificial lighting
Natural lighting is the most significant thing when photographing your home. With natural lighting, the colors are going to ring truer. You won't have a yellow cast from artificial lighting. Turn all the lights off and try to make the natural lights happen on its own.
Pay attention to the time of day and weather
Overcast days are not going to give you the same drama or bright light look. Pick a time of day that there's a lot of light in the room you are shooting.
Setting up a photo
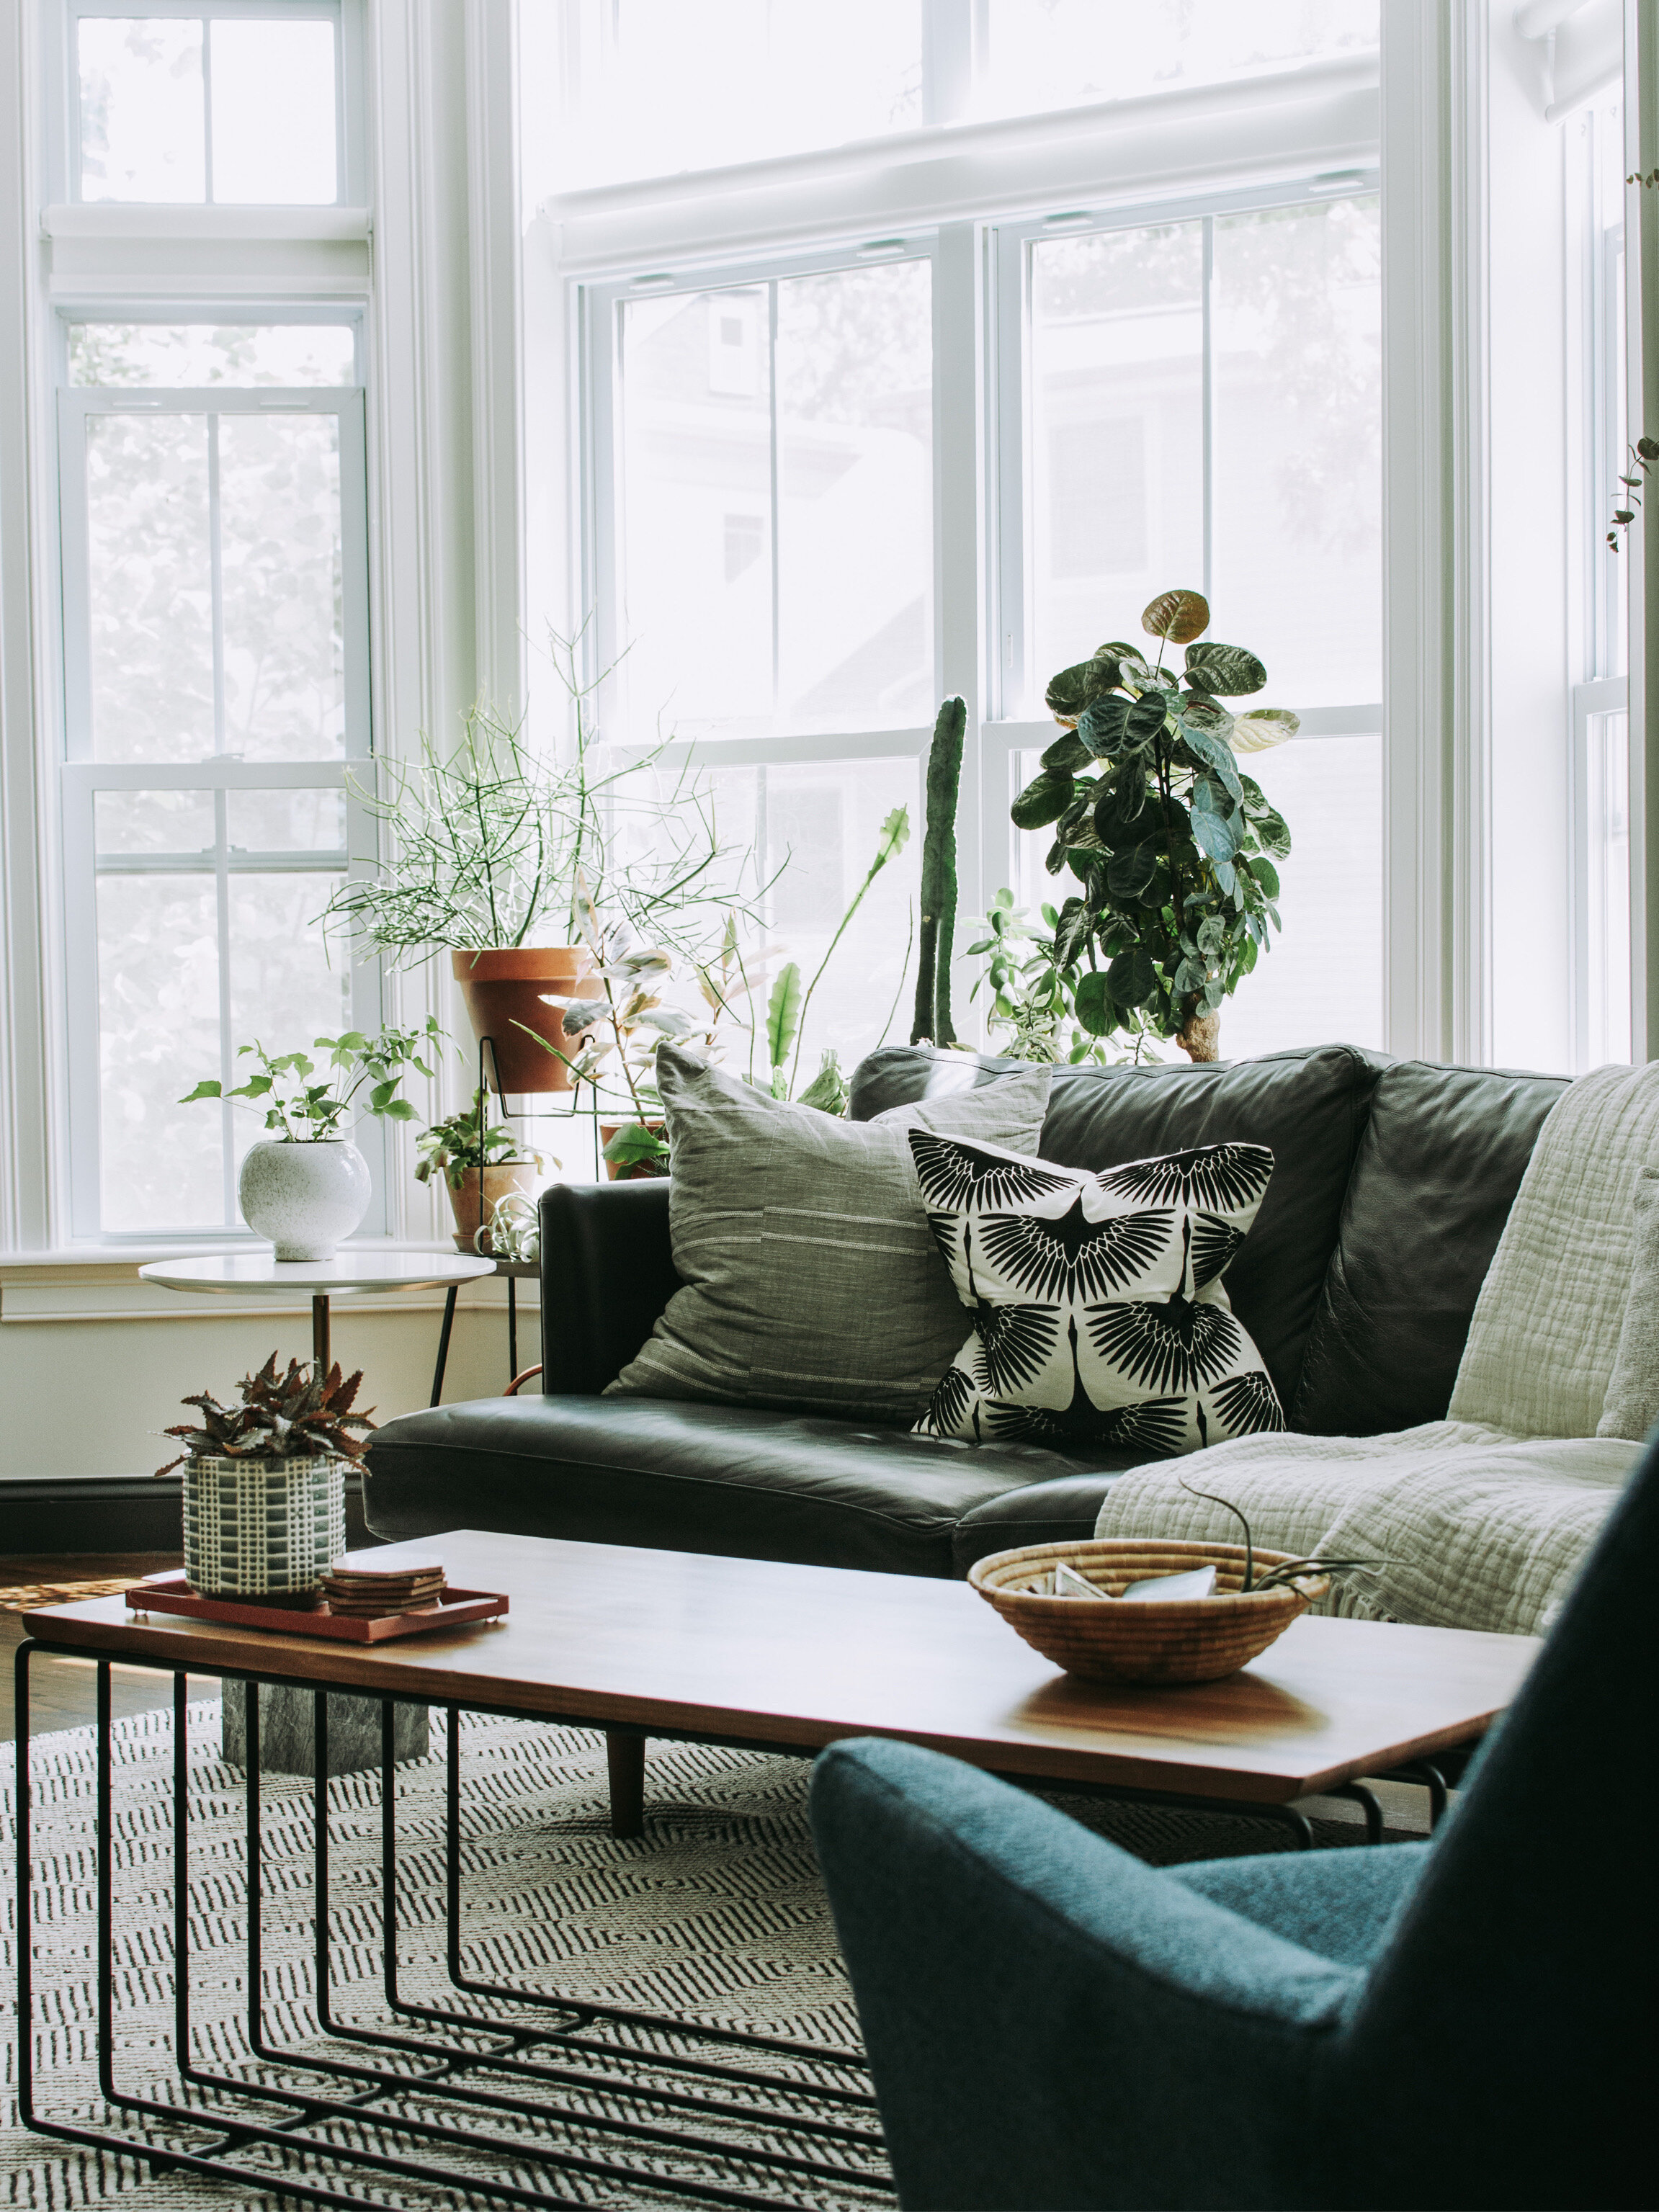
To get the professional shot, stick to shooting things straight on and flat surfaces. Imagine a grid and try to get everything perpendicular and parallel. The height at which you take the photo matters. The best angle is midway up. If you get too high, you lose the floor, which makes the room feel off, bring the camera a little lower, and it will allow the viewer to feel like they are in the space.
Type of equipment
Using a cellphone camera doesn't always provide the most flattering photo. Don't get me wrong. You can do amazing things with iPhone photography. You can fix a distorted image with editing programs, but you want to try to take the best photo first, which might mean taking many shots.
Whatever camera you end up shooting with, one of the best purchases you can make is a tripod. Use a tripod and get the adapter to eliminate camera shake and keep things in focus. Then you can get the angle and play with height to get the right shot.
Photo editing software
I exclusively use Lightroom. Some friends I know use VSCO and have liked it. I also think the iPhone photo editor has come a long way. Photoshop is not necessary unless you're trying to do real estate photography. Layering photos to get the right shot to sell the house. If you don't need that level of detail, skip photoshop for something simpler.
How do you overcome photographing smaller spaces? Bathrooms are the most challenging and can be a photographer's worst nightmare. Most bathrooms are tiny and without much natural light.
Take pictures outside of the room, open the door, and shoot from the hallway.
Don't be afraid to shove yourself in different corners of the room.
Use your tripod to help capture the photo - you can get the camera further back if you're not behind it.
If you do own a DSLR, you can play around with changing lenses. If you're trying to showcase your vanity and mirror's vignette, then the lens change will be trial and error.
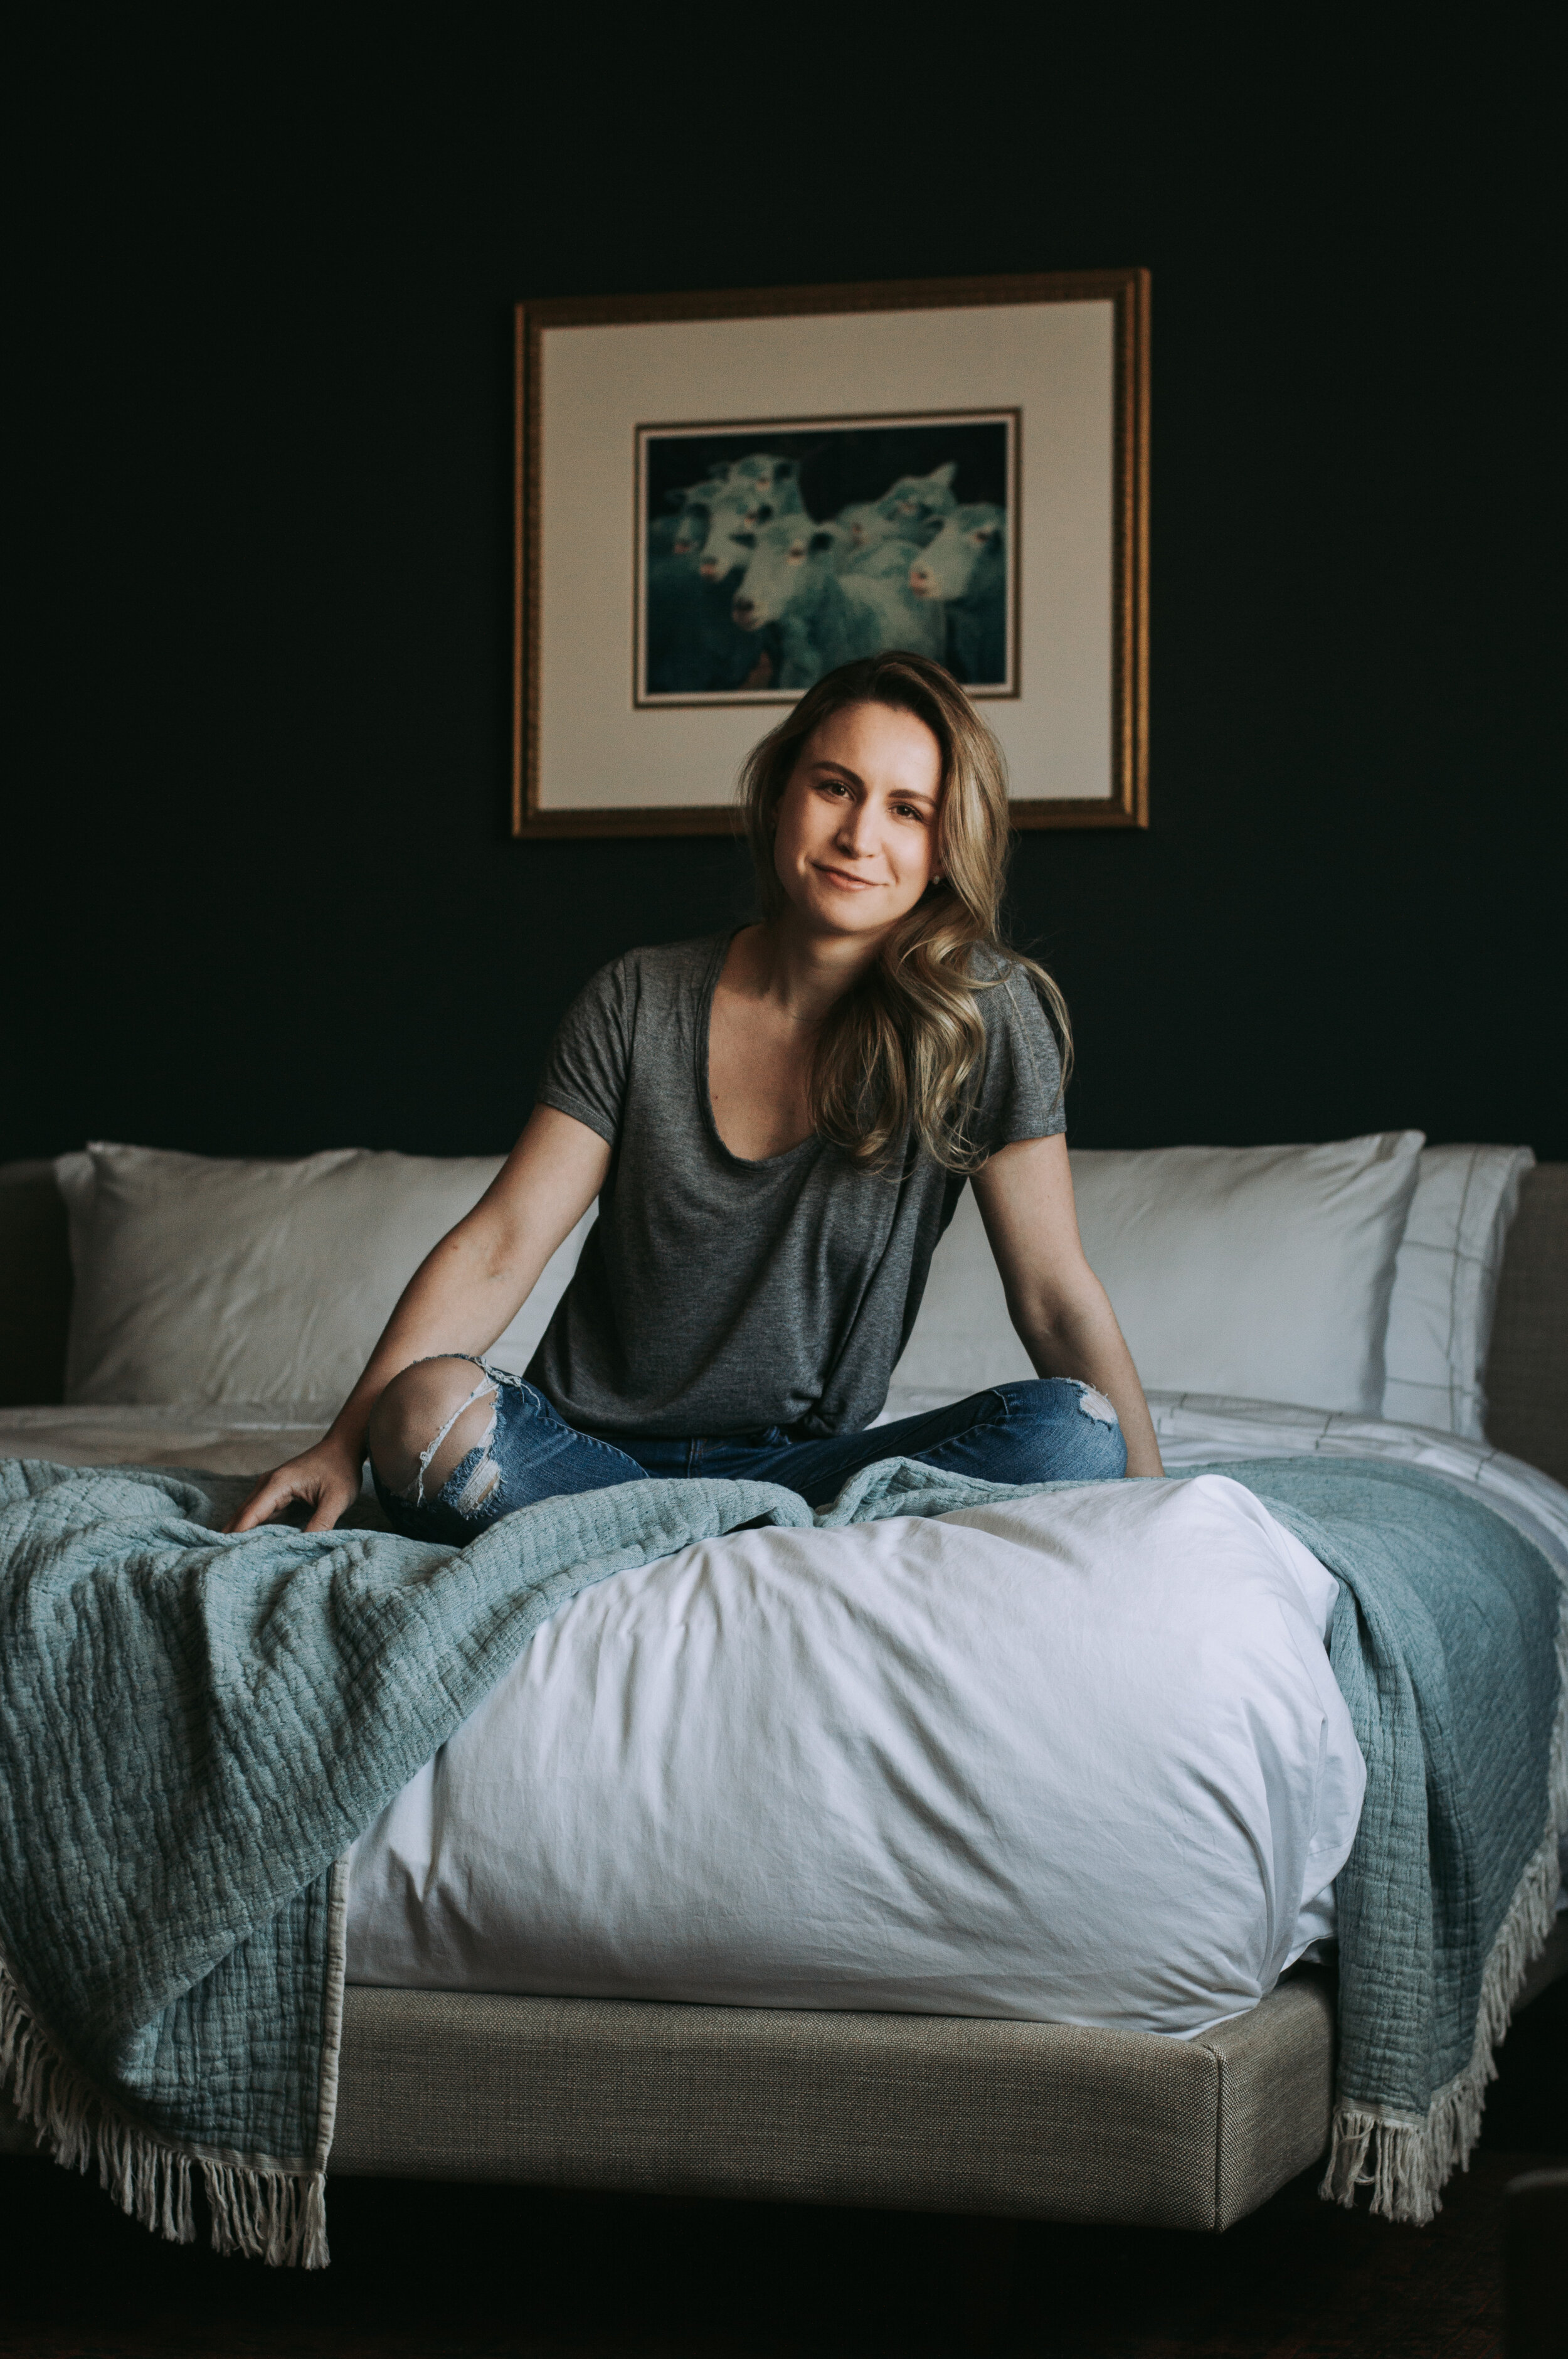
While Lisa does a fantastic job capturing her interior space, she's also not afraid to design with moody colors. She considers her style moody-modern. "It's a modern contemporary with love for mid-century. I tend to go towards darker colors on the walls, and I find that mid-century furniture pieces balance out the heaviness. I love the big furniture pieces that are functional, but the esthetic came first. In a perfect world, things are very functional but beautifully designed. "
What's the best approach to photographing dark colors? It's very similar to the tips listed above; remember natural light, pick the right time of day, and use a tripod.
Pro-tip for DSLR cameras change the shutter speed to be slower to allow more light to get into the image.
What has been your favorite space in your home to photograph?
I like them all for different reasons but probably the living room because it is the largest space and gives more varieties of angles plus it has most of my plant collection. A close second will be the bedroom because of the drama with the dark color and light streaming in with a lot of texture.
Inspiration
Instagram is usually my go-to place - while it is curated, you can branch out more. It's hard to remember that I have a unique voice when you see many of the same design styles in a curated feed. Working at Hudson gave me a lot of creative fuel and just staying true to the question above, is it beautiful and do I think it’s beautiful.
You can find Lisa, at One Door Home on Instagram for all your moody-modern inspiration and beautiful indoor plants.